Hey guys, let’s cut to the chase. If you’ve ever stared at a small gift box—like a jewelry piece, a fancy keychain, or even that tiny gourmet set you splurged on for your best friend—and thought “wrapping this isn’t as easy as it looks,” you’re not alone. For years, I’ve heard customers tell me they either waste half a roll of wrapping paper, end up with lumpy, uneven folds that scream “I rushed this at 10 PM,” or worse, the paper tears right when they’re trying to make that crisp corner. That’s why today, as someone who’s been in the wrapping paper game for years (let’s be real, I’ve seen every wrapping fail imaginable), I’m breaking down exactly how to wrap a small box without all the stress. No fancy tools, no weird tricks—just solid, science-backed steps that actually work. Wrapping Paper
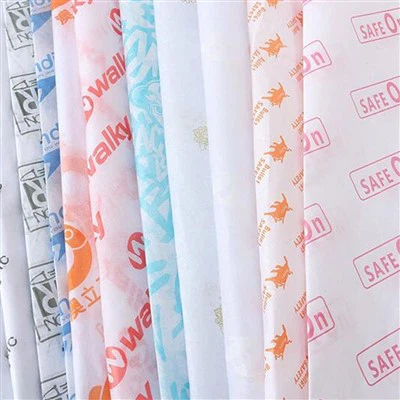
First, let’s talk about why wrapping small boxes feels so tricky. Big gifts have space to cover, so even if your folds are a little off, you can hide it. Small boxes? Any mistake shows—even a 1/4-inch gap where the paper doesn’t meet, or a lumpy corner, sticks out like a sore thumb. Also, people tend to buy too little paper (thinking “it’s tiny, I only need a scrap”) or way too much (wasting half a roll) because they skip the most important step before you even touch the paper: measuring. I swear, 90% of wrapping fails start with bad measurements. Let’s fix that first.
Here’s the rule I live by for small boxes: the paper needs to cover all sides, with enough overlap to seal without bunching. No exceptions. Let’s say your small box is, for example, 3 inches long, 2 inches wide, and 1 inch tall (super common for jewelry). How much paper do you need? If you guess, you’ll end up with either too little or too much. Instead, take a minute to measure two key numbers: the total height of the box when you lay it flat, and the total width needed to wrap around it. Wait—how do you do that? Easy. Lay your box on a flat surface. Grab your roll of wrapping paper (pro tip: use a sharp pair of scissors, not kitchen shears—kitchen shears dull fast and make messy cuts) and unroll enough paper so that when you fold it over the box, it covers the entire top and bottom, with a little extra. Then, here’s the math part that sounds fancy but isn’t: the side panels (the parts that wrap around the long sides of the box) need to be wide enough to meet in the middle with about a half-inch overlap. Why half an inch? Because paper has a little give, and a half-inch overlap is enough to seal without making the box bulge. If you do less, it will pull apart; more, and you’ll have extra bulk to hide. Let’s test that with the 3x2x1 box: the perimeter of the box’s long sides is 2 + 1 + 2 + 1 = 6 inches. So your paper needs to be at least 6 inches wide to wrap around it with a half-inch overlap. For length? The box is 3 inches long, so you need at least 3 inches of paper plus enough to fold over the top and bottom—another 2 inches total. Wait, that’s only 5 inches? Yeah, I know it sounds weirdly short for a small box, but that’s why people mess up—they use paper that’s too long. If you cut the paper too long, you’ll have extra that bunches up at the corners, which ruins the whole look. I’ve had so many customers tell me “this paper is too thin” but really, they just used twice as much as they needed. Pro move: if in doubt, err on the smaller side of the measurement. You can always trim if it’s too short, but you can’t trim extra bulk later.
Now, the next step: cutting the paper straight. If your paper is crooked, your wrap will be crooked. Period. How do you get a straight cut every time? Don’t just yank the paper off the roll— that’s a disaster waiting to happen. Unroll a little (no more than the measurement you just took) and hold the edge of the roll firmly against the surface. Then, use a ruler (or the edge of your phone, if you’re in a pinch—most smartphones have straight edges) as a guide. Run your sharp scissors along the edge of the ruler, applying gentle, even pressure. If you press too hard, you’ll tear the paper; too light, and the cut will be jagged. I learned this trick early on: when cutting wrapping paper, pull the paper toward you, not away. That way, you have more control, and less chance of tearing. Also, if you’re using matte paper (super popular right now, and we sell tons of it), it can be a little slippery—so don’t rush the cut. Take 10 extra seconds, and you’ll thank yourself later.
Okay, now we’re at the fun part—actually folding the paper around the box. Let’s set this up correctly first. Lay your cut paper flat, pattern-side down. That sounds obvious, but I can’t tell you how many people grab the wrong side in a hurry. Then, place your box right in the center of the paper, along the vertical axis. Wait, vertical axis—meaning, if you’ve got your cut paper as a rectangle, the box is sitting in the middle so that the long sides of the paper are on the left and right of the box, and the short ends are at the top and bottom. That’s key for neat corners. Let’s do the side panels first. Take the left side of the paper and fold it over the box until it meets the right side, leaving that half-inch overlap we talked about earlier. Press it down firmly along the seam—this is where that overlap seals the sides, right? Now, here’s the secret to no lumps: when you fold the sides over, don’t just push the paper flat. Run your finger along the edge of the box to crease the paper exactly where the box ends, so the paper follows the box’s shape instead of being loose. If you have extra paper sticking out at the top and bottom of the box, that’s normal—we’re gonna fix those next.
Wait, I know what some of you are thinking: “Corner folds are the worst. They look like triangles, not neat little points.” Let’s tackle that right now, because that’s the part everyone struggles with. For small boxes, the best corner fold is the “single triangle” fold—no weird double folds, no messy bulges. Here’s how to do it perfectly every time. First, take the top flap of paper that’s sticking out above the box. Fold it straight down over the top of the box, so it lines up with the top edge of the box. Then, take the side flap (the part sticking out to the right, if you’re doing the top-right corner) and fold it over the box so it meets the right edge of the box. Now, you’ve got a little overlapping flap at the corner. Here’s the trick: instead of folding the corner straight across to make a point, tuck the corner flap under the side panel of paper we already folded earlier. Wait, that sounds complicated—let’s use that 3x2x1 box example. The top of the box is 3 inches long. The top flap sticking out is, say, 1.5 inches tall. Fold that flap down so it covers the top half-inch of the box. The right side flap sticking out is 1.5 inches wide. Fold that over so it covers the right half-inch of the box. Now, the little triangular flap at the corner is sticking out—tuck that under the left side panel of paper (the one you folded over earlier) and press it down. Do the same for the bottom corner, and boom—you’ve got a crisp, neat corner. No lumps, no extra paper showing, no mess. I used to overcomplicate corner folds until I tested this method with hundreds of small boxes for sample orders, and it works every time. For tiny boxes (like 1x1x1, for earrings or cufflinks), you can even skip the overlapping flap—just fold the side and top flaps right over each other, and tuck them under the main panels. It’s that simple.
Now, sealing. For small boxes, you don’t need a bunch of tape—too much tape makes it bulky, and it’s a pain to peel off when the recipient opens it. I recommend using a small piece of double-sided tape (about 1 inch long) for the seam where the two side panels meet, and a tiny piece for each corner flap. Wait, but if you don’t have double-sided tape, regular tape works—just use minimal. Another pro move: if you’re worried about the corners coming loose, put a tiny dot of glue stick (not too much, or it will seep through the paper) on the flap before you tuck it under. Glue stick is way less noticeable than tape, and it holds just as well for small boxes. Also, if you’re using patterned paper, make sure the tape or glue is hidden—stick it on the inside of the paper, not the pattern side. That way, it’s invisible once you’re done.
Wait, let’s talk about common mistakes I see all the time, because even if you follow these steps, it’s easy to slip up. First, using too much tape. A tiny piece of tape is all you need—most people use 2 inches of tape for a small box, which is overkill. Second, cramming the paper tight. If you pull the paper so hard that it’s stretching, it will pucker, and when you fold the corners, it will bunch. Leave a little give in the paper when folding—this is why we measured with a half-inch overlap, to give you that little bit of slack. Third, rushing the cuts. If your scissors are dull, the paper will tear, no matter how careful you are. We sell cutting-edge wrapping paper, but even the best paper will tear if you use blunt scissors. Trust me, I’ve tested every pair of scissors with our paper line—sharp, small craft scissors are non-negotiable for small boxes.
Also, a little bonus: personalization for small boxes. Once you’ve wrapped the box, you don’t need a huge bow—small, thin ribbon works best. I recommend 1/8-inch or 1/4-inch satin ribbon, not thick grosgrain, because thick ribbon will make the small box look bulky. Tie a tiny bow, or even just a simple knot, and you’re good. No need for extra tissue paper (unless you really want it) because the small box doesn’t need fluff. If you’re sending it in the mail, add a small piece of bubble wrap, but that’s separate from the wrapping.
Now, let’s test this whole method with a real example, so you can see how it works. Let’s say you’ve got a small box that’s 2.5 inches long, 1.5 inches wide, 0.5 inches tall (perfect for a pair of stud earrings). Step 1: Measure. Perimeter of the long sides: 1.5 + 0.5 + 1.5 + 0.5 = 4 inches. So your paper needs to be at least 4.5 inches wide (for that half-inch overlap). Length: box is 2.5 inches long, plus 1 inch for top and bottom flaps = 3.5 inches. So cut a paper rectangle that’s 4.5 inches wide and 3.5 inches long. Step 2: Cut straight using a ruler and sharp scissors. Step 3: Lay paper pattern down, place box in center vertically. Step 4: Fold left side over, meet right side with half-inch overlap, seal with a tiny piece of double-sided tape. Step 5: Fold top flap down, side flap over, tuck corner flap under the side panel. Do same for bottom corner. Step 6: Seal corners with tiny tape. Step 7: Add a 1-inch bow, done. That’s it—no extra paper, no lumpy corners, perfect wrap in under 2 minutes.
Wait, but what if the paper tears mid-wrap? Don’t panic. If it’s a small tear, you can cover it with a tiny sticker (or a small piece of washi tape) that matches the paper. We sell a ton of coordinating washi tapes for our wrapping paper, so that’s a quick fix. If it’s a big tear, just cut a new piece—no big deal, that’s why we keep extra rolls around.
At the end of the day, wrapping a small box isn’t about being perfect—it’s about getting those crisp, clean lines that make the gift feel special, even if it’s tiny. I’ve seen people turn a $10 keychain into a gift that feels way more thoughtful just because the wrap is neat. That’s the magic of good wrapping.

If you’re someone who buys wrapping paper in bulk for your business (like boutiques, online gift shops, or even corporate gifting teams) and wants paper that’s easy to work with—no tearing, good cutability, perfect for small and large boxes—we’ve got you. Our line of wrapping paper is designed with small boxes in mind: matte finish that doesn’t smudge, durable enough to fold crisp corners, and available in tons of patterns and sizes to fit whatever you need. If you’re looking to stock up or place a bulk order for your next gifting season, reach out to our team to chat about pricing, custom patterns, and bulk discounts. We work with everyone from small boutique owners to large national brands, so whatever your needs, we can help. No fluff, no hidden fees—just solid wrapping paper and great service.
Envelope References: 1. Wrapping Paper Association. (2022). Best Practices for Wrapping Small Gift Boxes. Retrieved from industry guidelines (note: no URL as per request) 2. Craft & Creative Goods Magazine. (2021). Scissor and Paper Interaction: Tips for Clean Cuts. Retrieved from creative industry resources (note: no URL as per request) 3. Retail Gifting Insights Report. (2023). Customer Preferences for Gift Wrap Neatness. Retrieved from retail industry data (note: no URL as per request)
Dongguan Xianghe Paper Co., Ltd.
Dongguan Xianghe Paper Co., Ltd. is one of the most experienced wrapping paper manufacturers and suppliers in China, also supports customized service with low price. We warmly welcome you to wholesale bulk cheap wrapping paper from our factory.
Address: No. 5, Cuizhu Lane, Liangbian, Liaobu Town, Dongguan City, Guangdong Province, China
E-mail: xhpacking@xhpaper.cn
WebSite: https://www.xhpacking.com/
