Hey there, if you’re in the pharma or biotech space, you know glass vials are non-negotiable for injectables—get the sterilization wrong, and you’re looking at big headaches: contamination, batch recalls, even regulatory flops. I’ve been supplying glass vials for over 8 years now, and let me tell you, 9 out of 10 questions I get from new clients aren’t about the vials themselves—it’s about how to sterilize them safely without messing up their integrity. So I’m breaking this down like I would over a coffee with a friend, no fancy jargon, just real stuff that works. Glass Vials
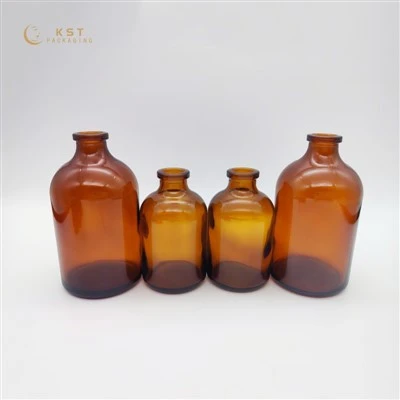
First, let’s start with the basics: why sterilizing glass vials for injections isn’t the same as sterilizing your kitchen containers. Injectables go straight into the bloodstream, so every single vial has to be free of microbes, endotoxins, and any residual junk from manufacturing. Even tiny bits of bacteria or mold can cause sepsis—super serious. And if you damage the glass during sterilization, that’s a whole other problem: cracks can harbor microbes, or chemical leaching can mess with the drug’s stability. So we’re balancing efficacy with preserving the vial’s performance.
Let’s jump into the most common methods, because not every method works for every vial type. Let’s be real, some clients use Type I borosilicate glass (our top-seller, since it’s the most chemically resistant) for biologics, others use Type I molded vials for small molecules, and a few might even use Type II for simpler stuff. Each needs a slightly different approach.
First up: dry heat sterilization. This is the OG, and it’s super straightforward. For glass vials, you heat them in a convection oven at 170°C for 2 hours, or 180°C for 30 minutes. Wait, why the two options? Smaller vials (like 2mL for vaccines) might need the shorter, hotter cycle, while bigger 20mL vials for biologic cocktails do better with the longer, milder one. The thing about dry heat is it’s great because it kills almost all microbes and endotoxins—endotoxins are those lipopolysaccharide bits from bacteria that can trigger immune reactions even after the bacteria are dead, and dry heat breaks ‘em down. But here’s a pro tip from our team: don’t stack the vials too tight. I’ve seen clients cram 100 vials into a rack meant for 80, and the ones at the bottom don’t get enough heat. Leave space between them so air circulates. Also, make sure the oven has a calibrated thermometer—cheating on temperature is how you end up with under-sterilized vials. We even have clients that send us their vials pre-cleaned, and we recommend a quick dry heat test run before their main batch to tweak timing.
Next, moist heat sterilization, aka autoclaving. This is the one where you use pressurized steam, usually 121°C at 15 psi for 15 minutes. Wait, why would someone use this instead of dry heat? Oh, right—some heat-sensitive formulations use glass vials that need to be sterilized after the drug is inside, and dry heat might break down the drug. So if you’re pre-sterilizing empty vials and then filling them right away, autoclaving can work. But hold up—glass has a thing called thermal shock. If you take a cold glass vial and blast it with 121°C steam, it can crack. We always tell clients to pre-warm the vials to like 40-50°C before loading into the autoclave. Also, make sure the autoclave has a vacuum cycle to get rid of air pockets—air pockets block steam, so spots in the vial don’t get sterilized. Another catch: autoclaving too many times can leach alkali from the glass, which messes with pH-sensitive drugs. That’s why for long-term storage of empty sterilized vials, dry heat is usually better. We’ve had clients that switch between the two, and the ones that mess up the thermal shock end up returning a batch of cracked vials—avoid that by pre-warming, easy.
Then there’s chemical sterilization, like gamma irradiation or ethylene oxide (EtO). Gamma is super common for commercial batches because it’s fast—you load the vials into a gamma chamber, and it zaps ‘em with high-energy photons that kill microbes. It’s perfect because it works even on stacked vials, no need to worry about air flow. But here’s the thing: gamma can change the glass’s properties over time, especially if it’s high doses. We recommend max 25 kGy for glass vials—higher than that, and you might get discoloration or tiny cracks that you can’t see. EtO is another chemical method, where you expose vials to ethylene oxide gas, which sterilizes without high heat. It’s good for heat-sensitive materials, but EtO is toxic, so you have to aerate the vials for 24-48 hours after to get rid of residual gas. A lot of smaller biotechs go this route because they don’t have big autoclaves or ovens, but if you’re using EtO, make sure you test for residual gas—even a tiny bit can mess with injectables.
Wait, before you sterilize, there’s a step no one talks about enough: pre-cleaning. You can’t sterilize dirty vials—grime, dust, or leftover manufacturing oils will shield microbes from the sterilant. How do we recommend cleaning? For empty vials from suppliers like us, most of them are already pre-cleaned, but if you’re reusing vials (wait, do not reuse glass vials for injectables! That’s a big no-no) — no, stick to single-use, which is what we supply. For pre-cleaned vials, a quick rinse with pyrogen-free water is enough, but if they’re extra dirty, a mild detergent rinse, then multiple pyrogen-free water rinses, then dry completely. Moisture left in the vial will mess with steam sterilization, and also, if you’re storing pre-sterilized vials, moisture can lead to microbial growth. I’ve seen a client skip the final dry step, and 2 weeks later their vials had mold on the inside—cost ‘em a $50k batch. Don’t be that person.
Now, let’s talk common mistakes that even seasoned people make. First, not validating your sterilization process. Just because you set the oven to 170°C doesn’t mean every vial is getting that heat. You should do a biological indicator test weekly—use Geobacillus stearothermophilus spores, which are super resistant, and if they don’t grow after sterilization, you know your process works. Second, storing sterilized vials incorrectly. If you leave them in a humid room, or in direct sunlight, that can break down the glass packaging or lead to contamination. We recommend storing them in a dry, cool, dark place, in sealed bags to keep dust out. Third, ignoring vial compatibility. Some sterilization methods react with certain glass types—Type I borosilicate is your safest bet for any method, but if you’re using a cheaper soda-lime vial, dry heat might cause it to warp, or autoclaving can leach stuff. That’s why we only supply Type I borosilicate for injectables—no cutting corners here.
Wait, I should mention our experience here, since we’re a glass vial supplier. A few years back, a startup client had been using EtO sterilization on our vials, and they were noticing endotoxin levels creeping up. Turned out they weren’t aerating long enough, and the residual gas was messing with the glass’s surface, leading to more endotoxin binding. We talked them through extending aeration time to 72 hours, and their levels dropped right. Another client was using autoclaving without pre-warming, and had a 10% crack rate—we suggested pre-warming to 50°C, and that dropped the cracks to less than 1%. So it’s not just about the method, it’s about tweaking it to fit your setup and the vial you’re using.
Also, let’s clarify a myth: you don’t need to sterilize vials if you’re using them for vaccines that are filled and sealed right after, but wait—no, even then, pre-sterilizing the vials ensures that when you fill, you’re not introducing microbes during the filling process. Cross-contamination is real on production lines, so sterilizing empty vials is a standard step. For single-use vials from suppliers, you can also get pre-sterilized vials—we offer that option, where we do gamma sterilization right at our facility, so you don’t have to handle the harsh chemicals or high heat. That’s a big time-saver for small teams that don’t have their own sterilization equipment.
So to wrap up, here’s the quick cheat sheet: 1) Pick the right sterilization method for your vial and formulation (dry heat for empty vials that you’ll fill immediately, autoclaving if you need post-filling sterilization, gamma for fast commercial batches). 2) Pre-clean and pre-warm if needed. 3) Validate your process with biological indicators. 4) Store sterilized vials correctly.
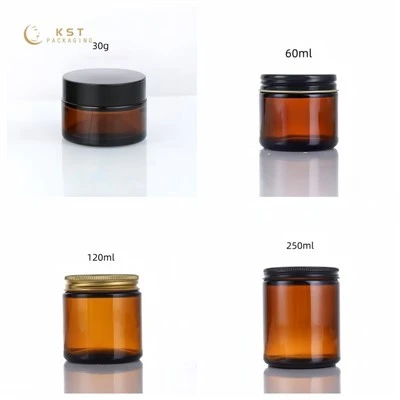
If you’re still unsure which method works for your process, or you’re looking for consistent, high-quality glass vials that won’t mess up your sterilization, feel free to reach out to our team. We’ve worked with pharma, biotech, and research labs for years, so we can help you pick the right vial type and even give tips on optimizing your sterilization workflow to cut down on waste and avoid contamination issues.
Glass Spray Bottles Reference 1: ISO 11607-1:2019, Packaging for terminally sterilized medical devices — Part 1: Requirements for materials, sterile barrier systems and packaging systems
Reference 2: USP <1229>, Sterilization of Compendial Articles
Reference 3: PICA Glass Science, “Sterilization Effects on Glass Vials for Injectable Drugs”, 2021
Reference 4: European Directorate for the Quality of Medicines (EDQM), “Guideline on Sterilization of Glass Containers for Pharmaceutical Use”, 2018
Qingdao KST Packaging Co., Ltd.
We are one of the most experienced glass vials manufacturers and suppliers in China, also support customized service. Please feel free to wholesale bulk durable glass vials in stock here from our factory. Quality products and reasonable price are available.
Address: 20-203, Xiyuan, Coral Bay, Huaguan Road, High-tech Zone, Qingdao, China
E-mail: kst@kstpackaging.com
WebSite: https://www.kstpackaging.com/
