Hey there – if you’re like most of us, your yard’s not a perfectly flat, man-made canvas. Mine’s got a wonky slope by the patio, a little dip near the flower beds, and that one patch by the driveway that’s just… not level. When I decided to put up a garden fence last year, I almost bailed ‘cause I thought uneven ground would make the whole thing impossible. Spoiler: it’s totally doable, and as someone who’s worked with garden fences for years (yeah, I’m the team lead over at our fence supplier, so I’ve helped hundreds of folks work through this exact problem), I’m gonna walk you through every step so you don’t mess yours up. No fancy jargon, no overcomplicated tools – just real, hands-on stuff I’ve tested on my own wonky yard. Garden Fence

First off, let’s get one thing straight: you don’t need to go dig out a whole flat spot just to put up a fence. A lot of new folks think that’s the rule, but it’s not – that’s the big myth I see people get stuck on. Uneven ground actually works with a few simple methods, depending on how much your yard slopes or dips. I’ve got standard panels, but we also make adjustable post brackets for exactly this scenario – more on that later, but don’t go buying off-the-shelf stuff without checking if it’s compatible with uneven terrain.
Before you touch a shovel, do your prep right. This part’s boring, but skip it and you’ll end up with a fence that leans, wiggles, or rots way too fast. First, mark your fence line. Use string and stakes – pull the string tight from one end to the other, and make sure it’s the height you want your fence (I always go 2 inches above the tallest grass, so it’s not a hassle to mow around). Next, call your local utility company – this is non-negotiable. You don’t wanna dig up a gas line, water main, or cable line ‘cause you skipped this step. Most places will come mark those lines for free in a day or two, so just give ‘em a ring.
Then, clear the area along the fence line. Cut back any bushes, pull up weeds, remove rocks bigger than a softball – those’ll get in the way when you’re digging post holes. If your ground’s super soft or has a lot of clay, add a layer of gravel later for drainage, but we’ll get to that. Now, the main decision here is: what method are you gonna use for the unevenness? There are three go-to methods, and I pick based on how much ground I’m working with. Let’s break ‘em down:
-
Racking the Panels (For Gentle Slopes – Less than 1 foot of height difference). This is the easiest one, perfect if your yard slopes gradually. Racking means cutting the top of your fence panels to match the slope of the ground, so the bottom stays straight and the top follows the hill. Wait, wait – let me correct that, sometimes people mix it up: no, the bottom follows the ground, so each panel’s height is the same where it meets the ground, and the top is a slanted line. Yeah, that’s right. So how do you do this? First, set your first post at one end, plumb it straight (use a level, obviously – a small torpedo level works fine, no need for a big fancy one), and backfill the hole with dirt and a little gravel, tamping it down as you go to keep it solid. Next, measure the distance from the ground to the top of where your next panel will sit – since it’s sloping, that distance will change each time you move along the line. Cut the bottom of each panel to match that height. Wait, no – wait, if the ground’s going up a slope, the panel’s bottom will be higher each time, so you trim the bottom of the panel to fit. If it’s a dip, the bottom’s lower, so you cut a little off the bottom too? No, actually, for dips, you can just leave the panel longer and let it sit in the dip, but make sure the posts are still plumb. Wait, let’s make that simpler: for any slope under 12 inches total difference along the fence, racking works. The key here is keeping your posts plumb even if the ground around them is uneven. Don’t tilt your posts to match the slope – that’ll make the whole fence unstable. Keep each post straight up and down, and adjust the panels to fit between them. We sell pre-cut racked panels for these jobs, but if you’re DIYing, just use a circular saw to trim the bottom edge of each panel to match the ground between two posts.
-
Stepping the Fence (For Moderate Slopes – 1 to 3 feet of height difference). This is when the slope’s a little steeper, so racking panels would look weird and not sit right. Stepping means creating level “steps” along the fence line, so each section of fence is flat, and you shift between sections at each post. So if your ground goes up 2 feet over 10 feet, you’ll have four posts, each set into the ground such that between post 1 and 2, the ground’s flat, post 2 and 3, another flat section, etc. How do you mark the step height? Grab a 4-foot level and a tape measure. At your first post location, measure how high from the ground the fence’s top should be (say, 48 inches, that’s a standard 4-foot garden fence). Walk along the fence line to where you want the next post, hold the level against the first post, and mark 48 inches on the level – that’s the height you need for the second post’s ground. Dig the second post hole so the ground at that spot lines up to 48 inches when the post is set. Repeat along the whole line. This method gives you a super stable fence, no weird slanted panels, and it’s way less likely to warp over time. Pro tip: we make extra-long posts for stepping so you can adjust the depth easily – no need to cut down posts, just set them deeper in the ground where the ground’s lower.
-
Using Adjustable Post Bases (For Super Uneven Ground – More than 3 feet of height difference). If your yard’s got big dips, mounds, or even a raised bed that the fence has to go around, forget digging post holes at weird angles – use adjustable post bases. These are metal brackets that sit on top of the ground (you don’t even have to dig holes, as long as the ground’s firm) and let you tilt the post in any direction to stay plumb. Wait, no – some are for height, some are for angle. The angle-adjustable ones are perfect for uneven ground. You bolt the base to a concrete pier or even to compacted gravel, then insert your post into the base and adjust the bolts to tilt it straight up, no matter how lopsided the ground is. This is my go-to for tricky spots – I used these around my new raised vegetable beds last year, and they’re still totally straight even though the ground drops a foot there. Just make sure you secure the base good – if it’s on soft ground, put a 12×12 inch concrete pier under it so it doesn’t sink over time. We sell these adjustable bases right alongside our standard posts, so you don’t have to hunt for them at a hardware store.
Now, post holes: no matter which method you use, the holes need to be deep enough. General rule is 1/3 of the post’s length goes into the ground. So if your post is 6 feet tall (4 feet above ground, 2 feet below), dig a 2-foot deep hole. If your ground’s super sandy, make it a little deeper – 2 1/2 feet – so the post doesn’t blow over in a wind. For each hole, add 4 inches of gravel at the bottom for drainage – this keeps water away from the post’s bottom, which prevents rot. Then set the post, hold it plumb with your level, and backfill with dirt, tamping every 6 inches as you go. If you’re using concrete, wait 24 hours before hanging panels – concrete takes time to cure, and you don’t want the post moving while it sets.
Now, hanging the panels. If you’re using racked panels, just nail or screw them to the posts, making sure the bottom edge sits flat on the ground. For stepped fence, each panel goes between two posts, and since each section’s level, the panels hang straight. For adjustable bases, the post’s already plumb, so just attach the panels like you would on flat ground. Don’t use too many nails – 3 per panel per post is enough. Too many will split the wood, and not enough will make the panel wobbly. Also, leave a 1/4 inch gap between the bottom of the panel and the ground – this lets water drain out, so your panel doesn’t sit in mud and rot faster. I see people make this mistake all the time, and a fence that’s sitting on the ground will last half as long.
Wait, what about gates? Gates on uneven ground are the trickiest part, right? Don’t just hang a gate between two posts like you would on flat ground. First, figure out where the gate needs to sit – if it’s over a dip, set the two gate posts so the ground between them is level. If it’s on a slope, step the ground under the gate so the gate’s bottom is even on both sides. Then, use a gate hinge that’s adjustable – we make heavy-duty adjustable hinges that let you tweak the gate’s height after it’s hung, so it doesn’t drag on the ground. For extra stability, add a gate latch that secures to a post set at the same level as the gate’s bottom. If your gate’s on a slope, you might have to trim the bottom of the gate to fit, but the adjustable hinges will make that way easier.
Now, a few mistakes I see all the time that ruin a fence on uneven ground. First, trying to force a flat fence onto uneven ground – that never works. You’ll end up with a fence that leans so bad it looks like it’s gonna fall over, or you’ll have gaps big enough for a dog to squeeze through. Second, not compacting the backfill around posts. If you just throw dirt in and walk away, the ground will settle, and your post will tilt. Tamp it down with a tamper (or even a big rock, if you don’t have a tamper) every 6 inches. Third, skipping the utility call – I can’t stress this enough. One of our customers last year dug up a fiber optic line and had to pay thousands in repairs, just ‘cause they forgot to call. Don’t be that person. Fourth, using cheap nails or screws. Our fence panels are pressure-treated, so they’re built to last, but cheap fasteners will rust and break in a year. We sell corrosion-resistant screws that are perfect for outdoor use, way better than the ones at the dollar store.
So, if you’re still not sure which method works for your yard, or you need help picking the right posts, panels, or adjustable bases, our team’s here to help. We’ve helped homeowners with everything from a tiny slope in their backyard to a big dip by their garage, and we can walk you through measurements, give you a custom quote, and even send you free samples of the panels so you can see how they work with uneven ground. No pressure, just honest advice – that’s what we do. Fence installation doesn’t have to be a headache, even on wonky ground, and we wanna make it easy for you.
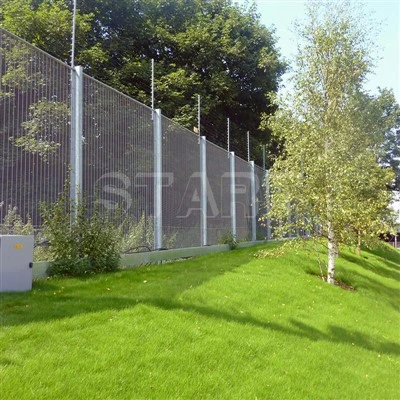
Now, let’s wrap it up. Uneven ground isn’t a reason to skip a garden fence – it’s just a reason to pick the right method. Racking for gentle slopes, stepping for moderate ones, adjustable bases for tricky spots. Prep right, call the utility company, take your time with post holes, and don’t skimp on fasteners. If you mess up a step, it’s not the end of the world – just adjust. The goal is a fence that works for you, keeps pets in, keeps critters out, and looks good, no matter how lumpy your yard is.
Deer Fence References
- American Fence Association. (2022). Installation Guidelines for Fences on Sloped and Uneven Terrain.
- U.S. Department of Agriculture. (2021). Wood Fence Durability: Drainage and Post Installation Best Practices.
- Outdoor Living Institute. (2023). Adjustable Fence Hardware for Non-Level Ground Applications.
Beijing Kaishi Import and Export Trade Co., Ltd.
Beijing Kaishi Import and Export Trade Co., Ltd. is one of the most professional garden fence manufacturers and suppliers in China. With abundant experience, we warmly welcome you to buy bulk customized garden fence from our factory. If you have any enquiry about quotation, please feel free to email us.
Address: Room 01-2708, China Resources Vientiane City No.108 Zhongshan West Road, Qiaoxi District Shijiazhuang, Hebei Province, P.R.China
E-mail: Info@startprocurement.com
WebSite: https://www.startprocurement.com/
